Generating 360° Video Game Panoramas
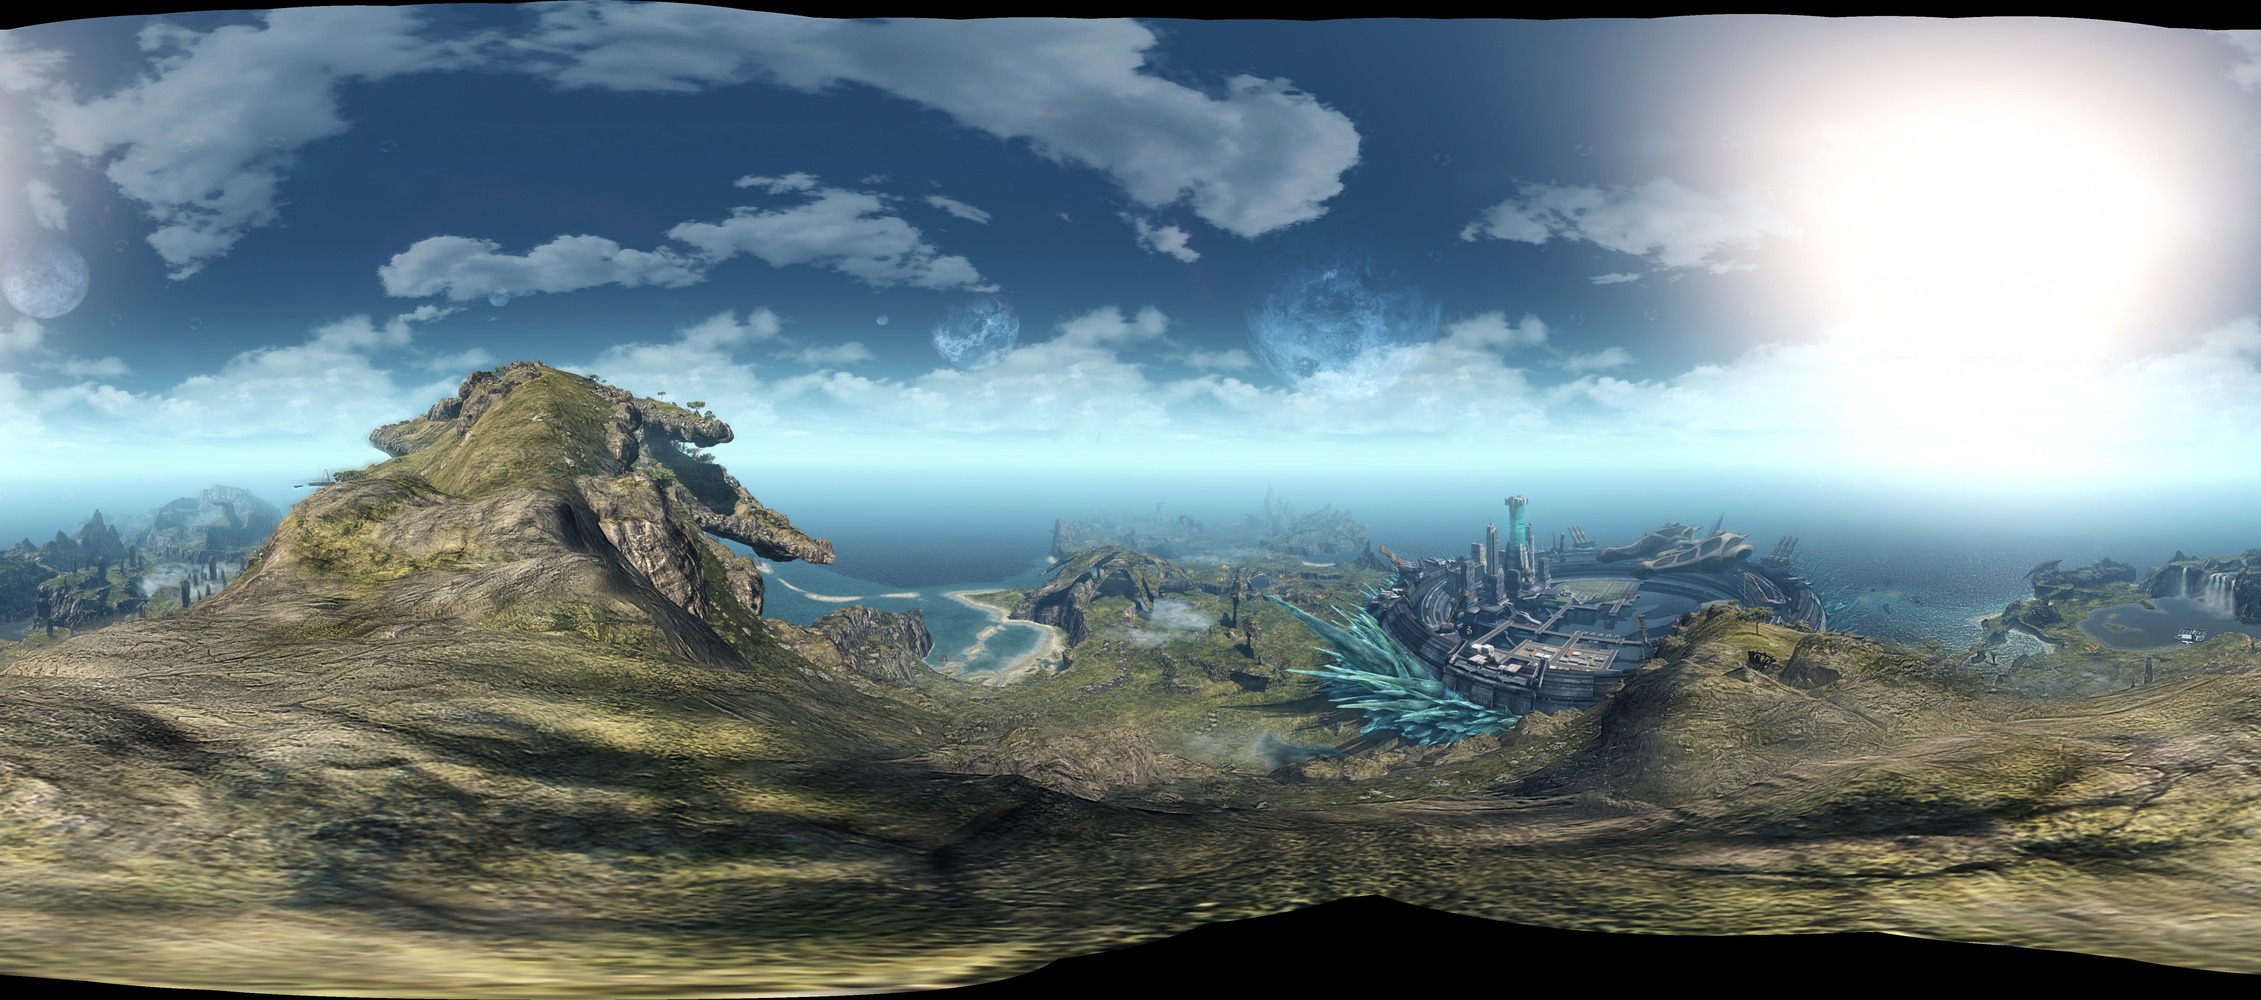
FrontierNav's core is its interactive maps; it's what everyone uses it for. However, top-down 2D maps don't provide a sense of scale, nor verticality. 360° Panoramas is FrontierNav's solution to that problem.
The actual programming side of this was pretty simple and I'll go into that in a later post. This post will focus on the harder part: actually generating panoramic images.
How are 360° panoramas made?
360° panoramas take a 2D image and map it to the inside of a 3D shape. A camera is then placed in the middle of it for us to control and look around.
To create a 2D image of a 3D view we use a projection. It's the same sort of idea behind world maps: take a 3D object (Earth) and map it to a 2D image (a world map). The only difference is that maps project the outside surface, and panoramas project the inside.
Some modern games actually let us create panoramas natively. Since they have full access to the 3D scene, they can project the whole thing onto a single image. However, most games don't support this. So we're limited to individual screenshots, kind of like how real-world cameras work. And like real-world photos, we can stitch each image together to make a full projection.
Choosing a stitching program
Stitching hundreds of images manually isn't something I'm into so we'll automate it. After some research, I landed on two free products: AutoStitch and Hugin. We'll be using AutoStitch. Hugin completely failed me where AutoStitch succeeded. I think Hugin's auto-stitching is relatively new, it's more geared towards manual stitching at the moment.
Taking screenshots
For this example, I'm making panoramas for Xenoblade Chronicles X, which is a WiiU game. Taking screenshots and transferring them from a WiiU to a PC would be tedious, so I used Cemu, a WiiU emulator. Cemu is surprisingly mature now; Xenoblade X works well and without direct comparisons, I couldn't notice any issues.
Let's first prepare the game for stitchable screenshots. Not all of these options are available in-game, we'll need to use Cemu's built-in community mods manager:
- Increase native resolution to 1080p.
- Xenoblade X is a 720p game so objects don't look much better beyond 1080p.
- Fix the brightness level.
- Disable weather systems.
- Change camera anchor to be centred and as high as possible.
- Move camera to first-person.
- Remove all HUD elements.
- Set the in-game clock to 12PM.
- That gives us enough time to take screenshots before lighting conditions change.
- Reduce movement where possible.
- Don't get photobombed by a Saltat.
- Tweak the field of view (FOV).
- Lower FOVs have less warping around edges so it may help with AutoStitch's overlap detection.
Now to take some screenshots. Each image needs some overlap for the auto-stitcher to work. How much overlap exactly is hard to know as it depends on the scene. The process is more or less:
- Centre camera dead ahead.
- Tap camera right and take a screenshot.
- Repeat for a full 360°
- Tap camera up, repeat the process.
- Repeat until tapping up does nothing.
- Centre camera dead ahead.
- Tap camera down and repeat the process.
- Repeat until tapping down does nothing.
It sounds easier to start by looking up all the way and work our way down, but I found AutoStitch worked better starting with a full set across the centre.
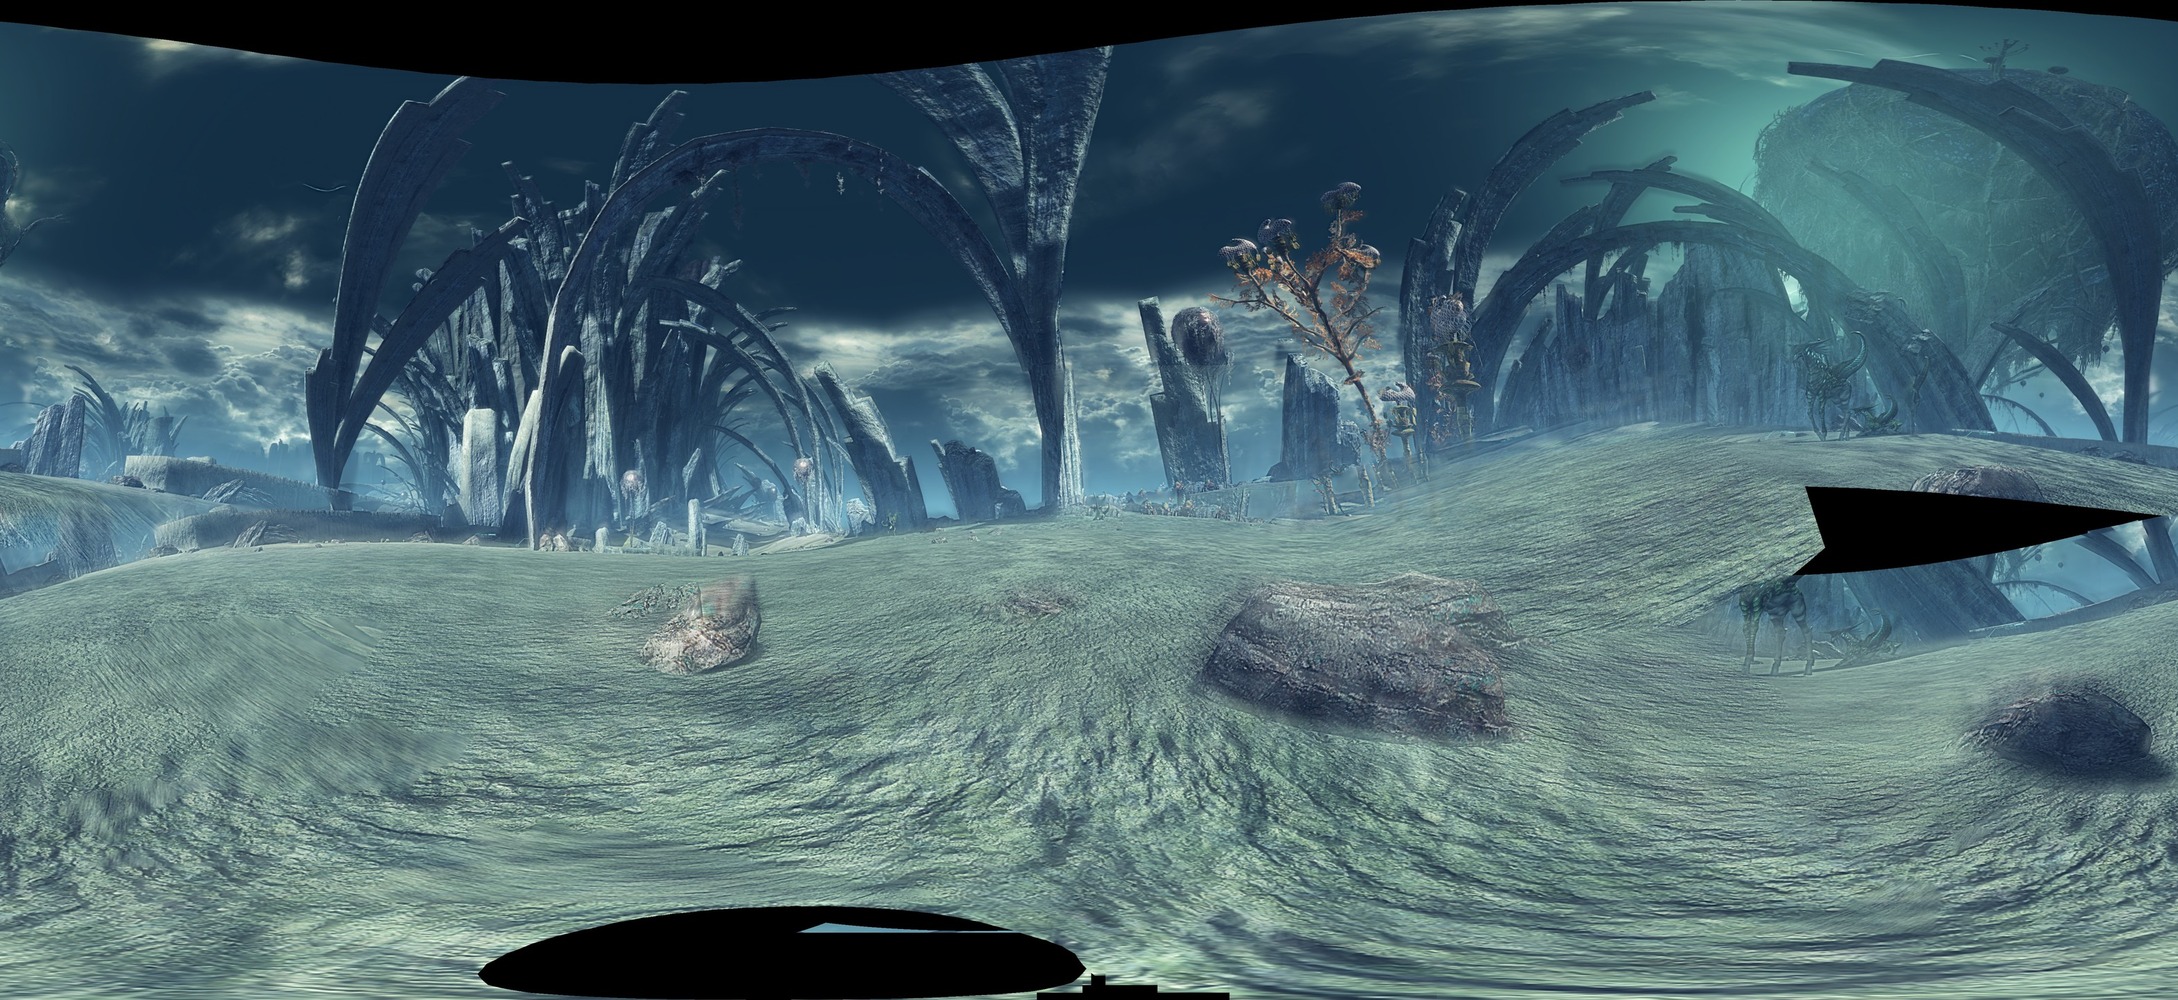
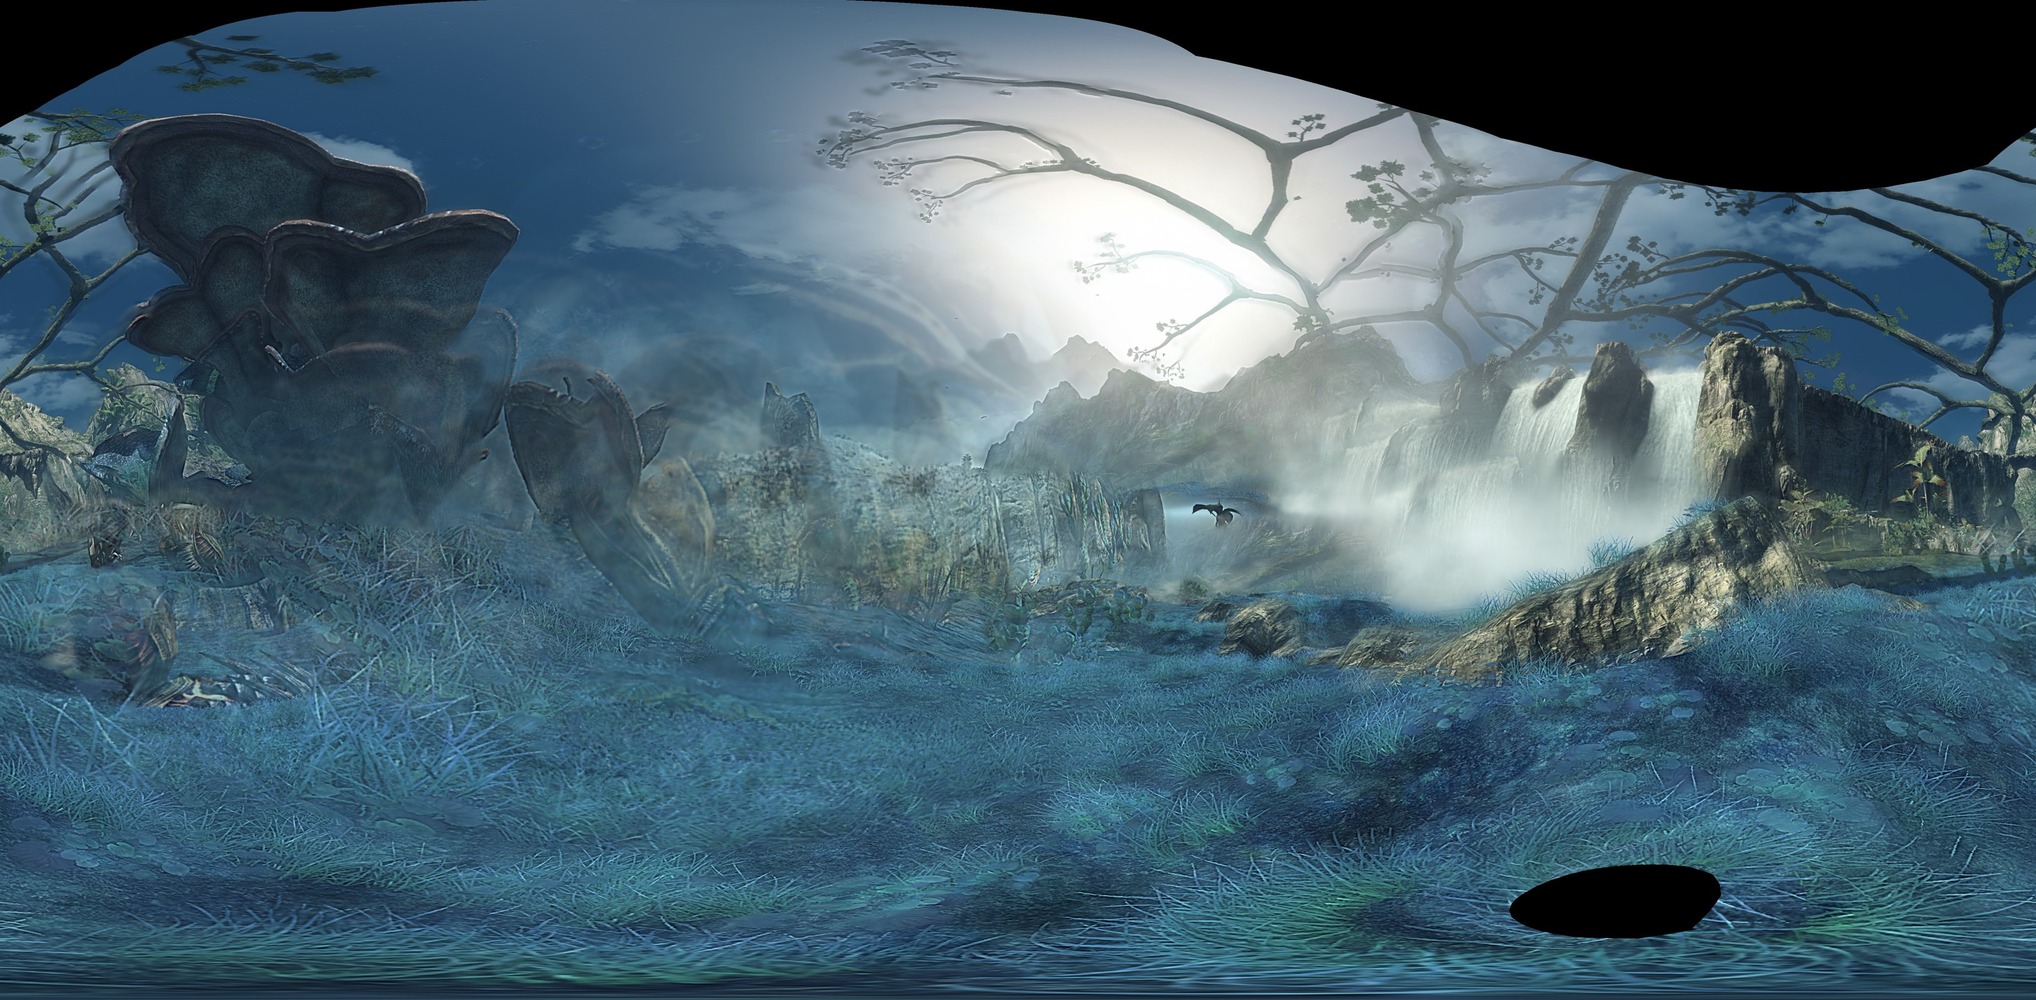
Above and below is mostly sky and ground. Games tends to have repeating textures on flat surfaces, so the horizontal edges of each screenshot will look similar. Having a detailed centre gives AutoStitch something to distinguish along those vertical edges. Following this logic, scenes with wide vistas and distinct geometry tend to work well.
Generating the panorama
AutoStitch only has a handful of configuration options. To better balance detail, time and file size, I suggest setting JPEG quality to 92 and image height to 3000. Considering most PC displays are 1080p, 3000p covers centre, up and down views. Leave the rest as default.
Once we're done taking screenshots, we can point AutoStitch to our screenshots folder and let it do its work. It takes a while so take a break and hope for the best.
Automating the process
After a while, manually moving the camera for hundreds of screenshots becomes hell. Automation is a major benefit of using an emulator so let's take advantage of it.
I've used AutoHotKey in the past for small things like pinning windows in front of other windows. Now was a good chance to use it for some actual automation. Here's what I ended up with:
Pause
Gosub TakePanorama

Gosub LookUp
Gosub TakePanorama
Gosub LookUp
Gosub TakePanorama
Gosub LookUp
Gosub TakePanorama

Gosub LookDown
Gosub LookDown
Gosub LookDown

Gosub LookDown
Gosub TakePanorama
Gosub LookDown
Gosub TakePanorama
Gosub LookDown
Gosub TakePanorama

Return

LookDown:
  Send {K down}
  Sleep 700
  Send {K up}
  Sleep 100
Return

LookUp:
  Send {I down}
  Sleep 700
  Send {I up}
  Sleep 100
Return

TakePanorama:
  Send {F12}
  Loop 18 {
    Send {L down}
    Sleep 200
    Send {L up}
    Sleep 300
    Send {F12}
  }
Return

z::Pause
x::Reload
c::
  Gosub LookDown
  Gosub LookDown
  Gosub LookDown
Return
To save more time, we can probably add another step to run AutoStitch.
To trigger the script, all we have to do is:
- Button map
I,J,K,Lto the right analog stick in Cemu. - Look all the way up and press
Cto look dead ahead. - Press
Xto reset the script. - Press
Zto start taking screenshots. - Wait until it's done.
Conclusion
Even with automation, generating panoramas is a tedious process. We still have to find a good scene, wait for the automation to finish, wait for the stitching to finish and deal with a disappointing end result. Xenoblade X might just not be a great game for it due to its fantastical scenery and low resolution.
Having said that, it's kind of mind-blowing when AutoStitch does generate something useable. When I first managed to generate one, it proved what was possible and I rode that high to perfect the process; spending hours of trial and error to figure it out.
It's not much, but you can view the results on FrontierNav. I'll generate some more when I get the chance. If you want to contribute some of your own, feel free to get in touch.
Thanks for reading.